By implementing custom messages, you can inform users about important updates, security reminders, or company policies they need to be aware of. This tool is particularly useful for keeping everyone aligned and ensuring that critical information reaches each user before they begin their daily work.
With Microsoft Intune, you can display custom messages to Windows users right before they log in. This article guides you through the step-by-step configuration process. You’ll discover how this functionality not only enhances communication with users but also strengthens security and compliance practices within your organization.
Creating the configuration profile
1. Access the Microsoft Endpoint Manager.
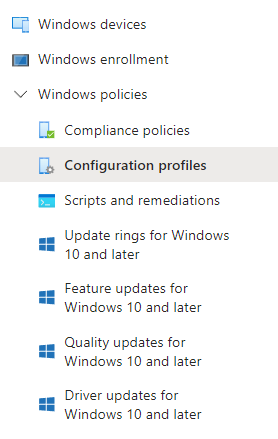
2. In the left pane, click on Devices, then Windows, and select Configuration Profiles.
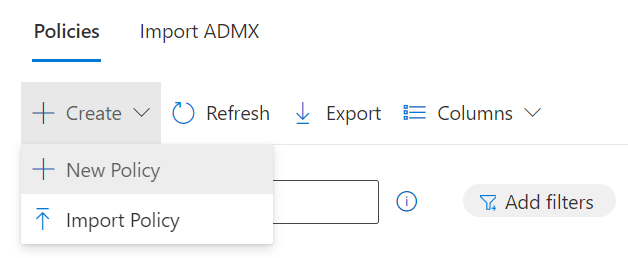
3. Click on Create and choose New Policy.
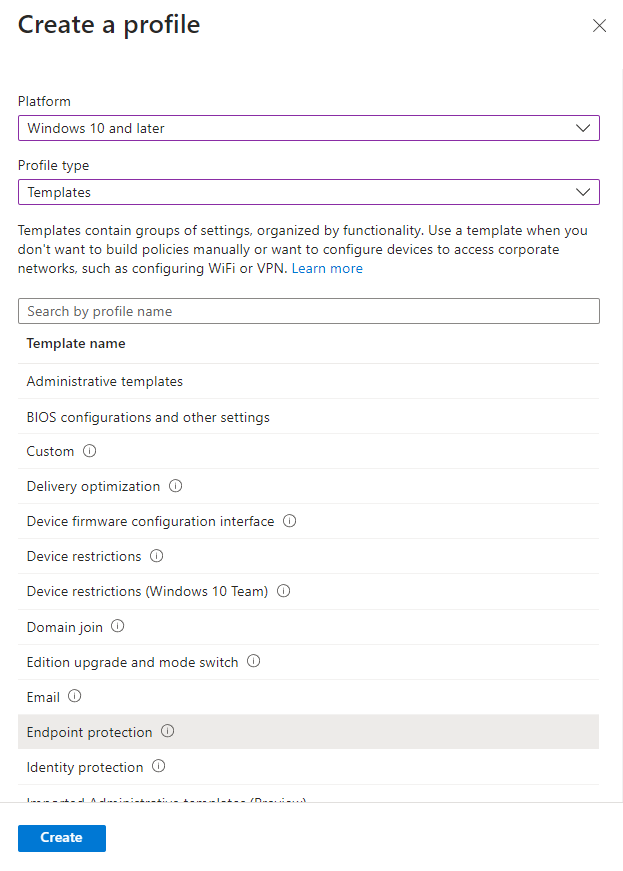
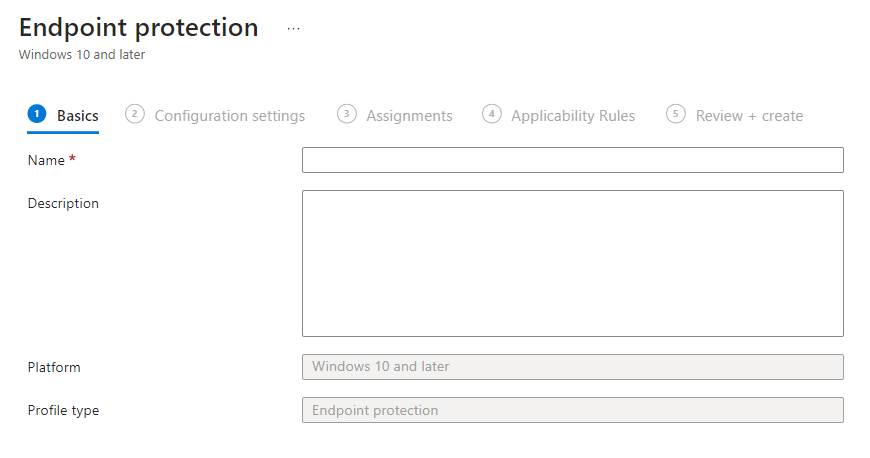
4. Select Windows 10 and later as the platform.
5. Then, choose Templates as the profile type you want to create, and afterward, select Endpoint Protection.
6. Click on Create..
7. In the Basics section, assign a name to the profile.
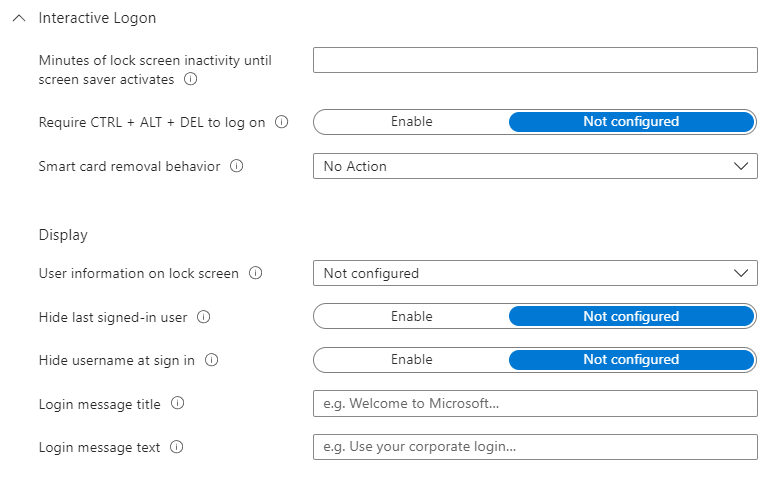
8. Next, in Configuration settings, click on Local device security options.
9. Then, look for where it says Interactive logon and fill in the fields for Title for logon message and Text for logon message.
10. In the Assignments section, select the device group or groups where you want to apply all the established settings.
11. Finally, review all the settings before proceeding and click on Create.